Deploy TKG workload cluster using TMC
Tanzu Mission Control (TMC) provides centralized management and visibility over various K8s clusters in a multi-cloud environment. You can read more about TMC in my other article where I described it’s core feature – policy based management.As part of the other article I moved through all the steps to deploy TKG 2.4 Management cluster and in this one for TKG Supervisor cluster.
Additionally here and here I’ve described how to connect TKG Management and Supervisor cluster to TMC respectively. Now I’ll leverage TMC to demonstrate workload cluster deployment against either TKG Management or Supervisor cluster based in on-premises environment. Steps that you are going to see below are applicable to both scenarios, doesn’t matter wheter you’ve got Supervisor or Management clusters in your environment.
Well, don’t waste time and let’s get our hands dirty with TMC !
- Login to your cloud portal at console.cloud.vmware.com. If you have access to multiple organziations make sure you’ve switched to the one that have access to TMC.
- Click Launch Service under VMware Tanzu Mission Control.
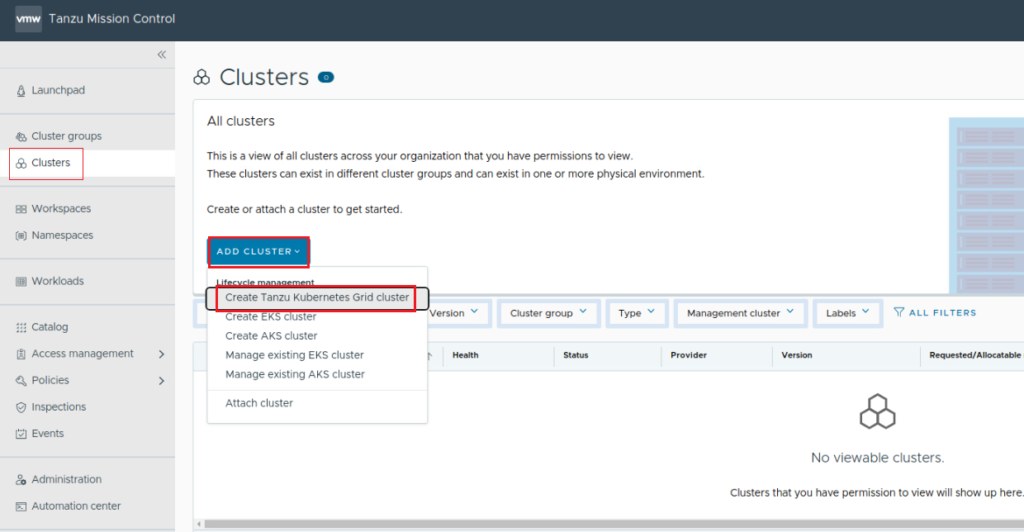
- Select Clusters and Create Tanzu Kubernetes Grid cluster in the ADD Cluster menu.
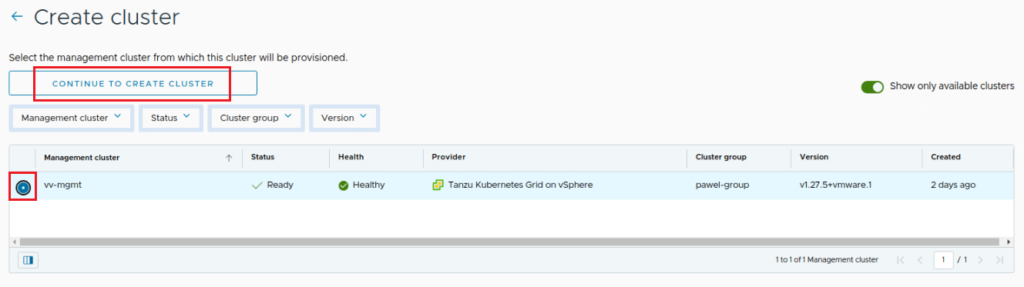
4. Select your Management / Supervisor cluster and click CONTINUE TO CREATE CLUSTER.
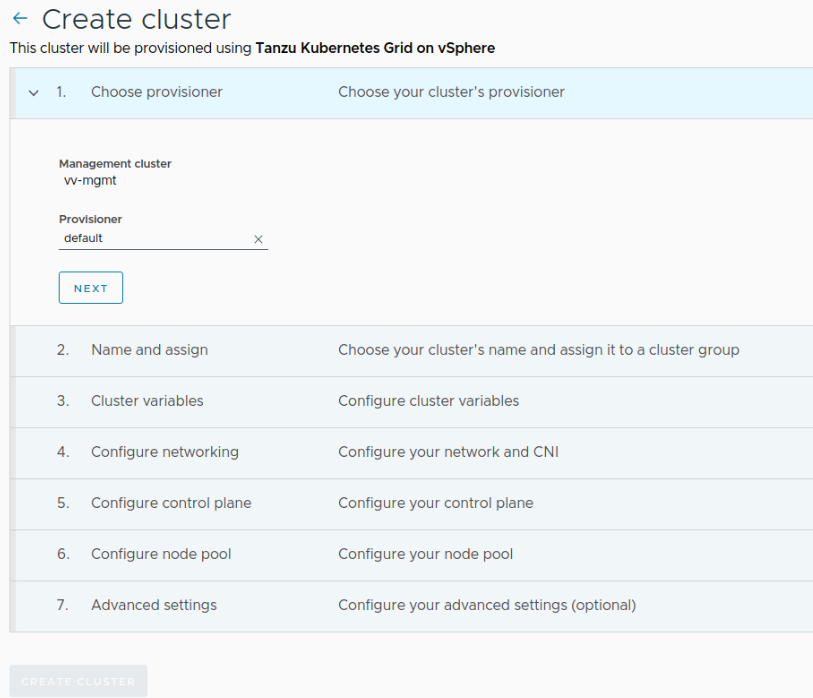
5. Select your provisioner – I’m using default, and click Next.
6. Specify your cluster name, assign it to a cluster group (must be created in advance) and cluster class. Optionally you can add description and labels which is a good idea but in my case it’s just a lab 🙂

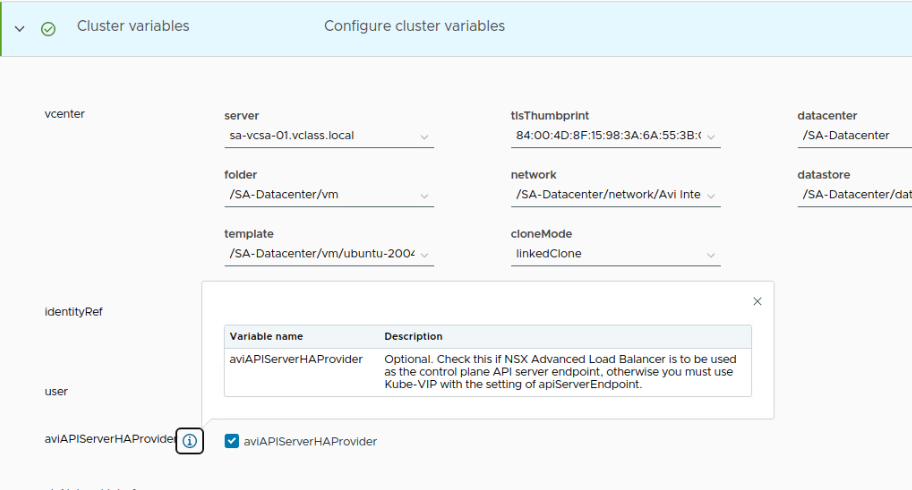
7. Define vSphere resources you want to use for your cluster. These objects available on the list for datastores, resource pools, etc are obviously read from your infrastructure. Apart from hosting environment you also need to define the compute resources that will be assigned to worker nodes as well as optionally you can define some of the network settings such as MTU for the network or the nameservers and search domains you might want to use. Those are optional, though.
Note: You can also specify the SSH authorized keys here that could be used later to access these nodes using SSH.
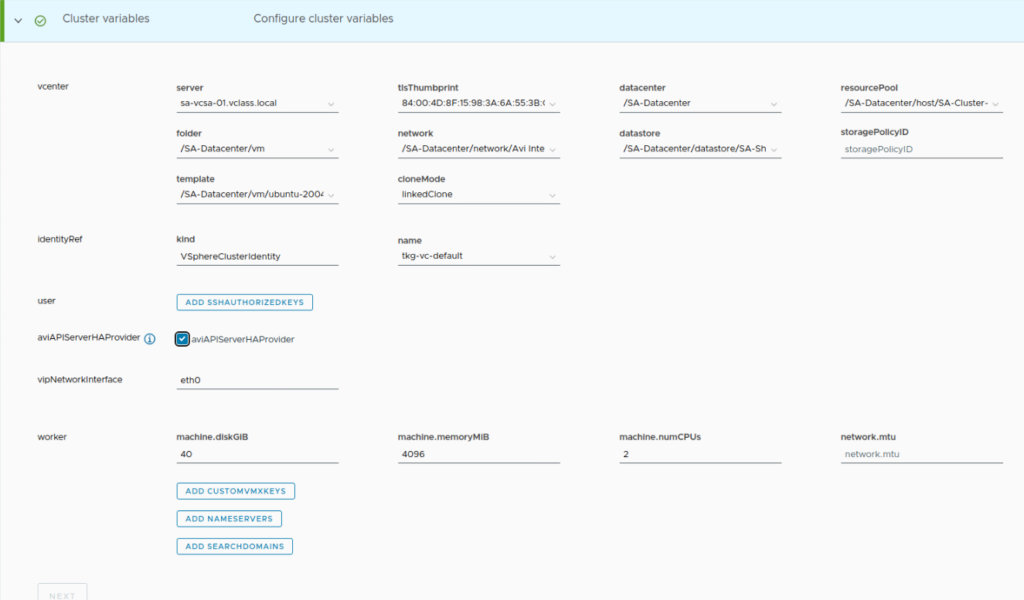
Note: If you are using NSX Advanced Load Balancer you also need to select aviAPIServerHAProvider, otherwise you won’t be able to commence the deployment 🙂
8. Under the Configure networking page you you adjust default Pod and Service CIDRs that will be used by CNI which can be selected as well. You can select either Antrea (default) or Calico.

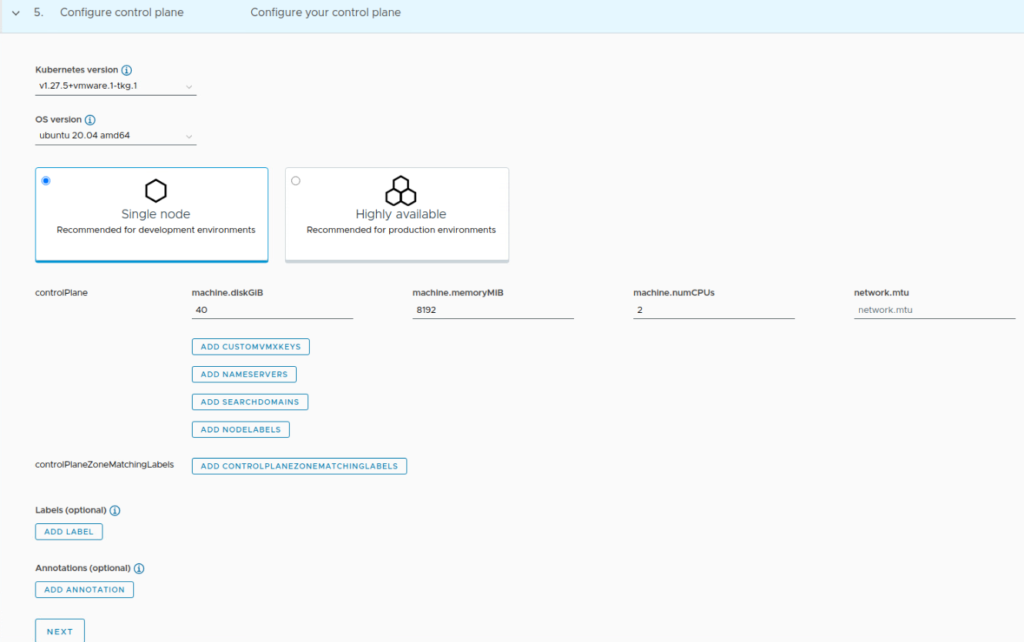
9. Specify the K8s version – just note that the available versions will be based on TKRs (Tanzu Kubernetes Releases) available in your environment as well as the OVAs or templates that you’ve imported in your vCenter. Management clusters relies on tempaltes while Supervisor relies on OVAs in a Content library.
Additionally youcan specify the number and resources of control plane nodes.
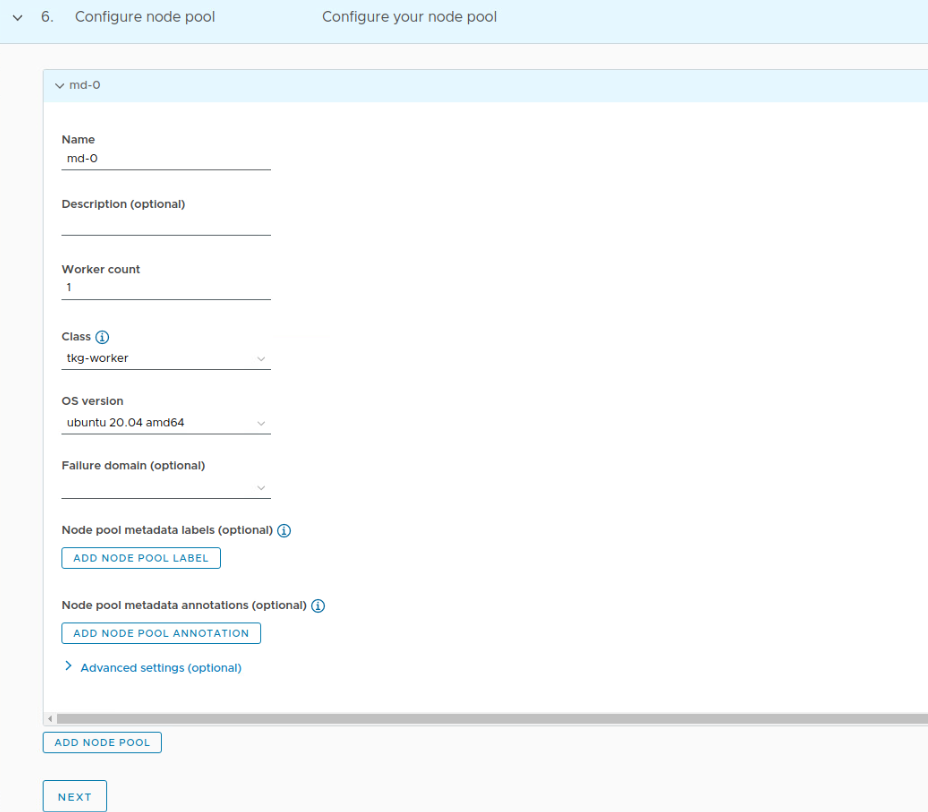
10. Once control plane nodes are defined it’s time for workers. Resources were defined in one of the previous steps. Here you can configure node pool or even more than one with the expected number of worker nodes.
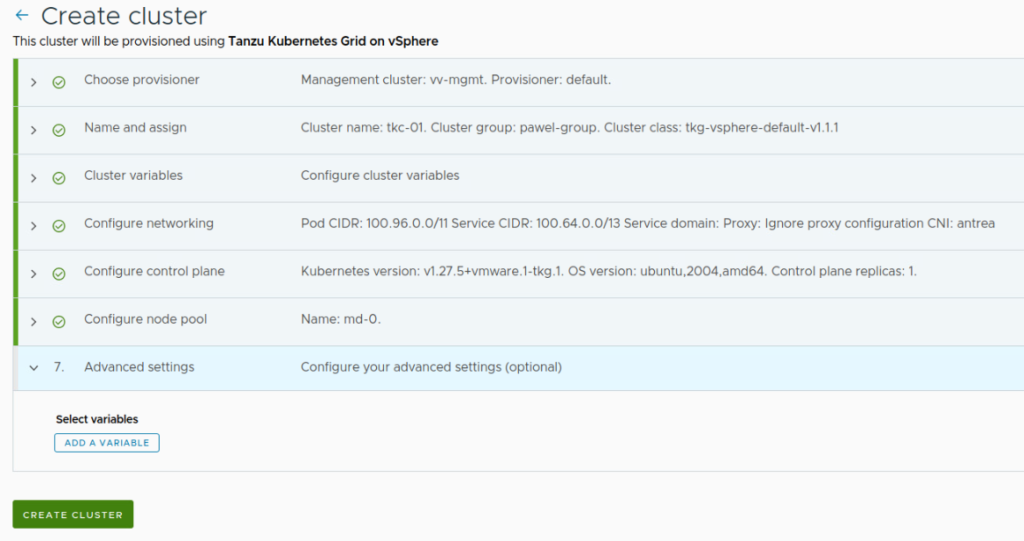
11. In the last step you can specify one or more of the optional settings.
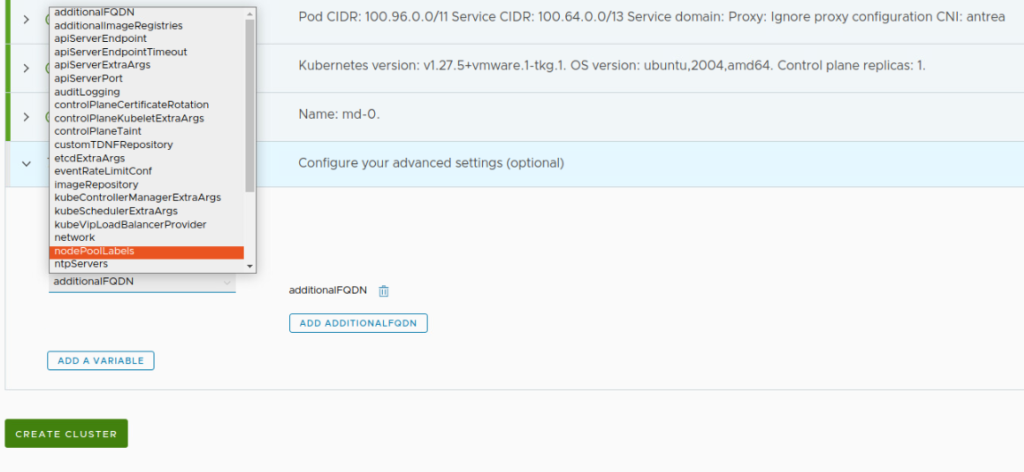
12. Finally, review your settings and click CREATE CLUSTER.
And now the magic starts! You should see your cluster definition in the unknown state for some time as presented below.

It will be like that for a few minutes during the deployment to finally turn green with Ready state! This concludes the steps to deploy a workload cluster using TMC.
Make sure you review my other posts in Tanzu category 🙂