Register TKG Management Cluster 2.4 in Tanzu Mission Control
Tanzu Mission Control (TMC) provides centralized management and visibility over various K8s clusters in a multi-cloud environment. You can read more about TMC in my other article where I described it’s core feature – policy based management.
As part of the other article I moved through all the steps to deploy TKG 2.4 Management cluster. Now I’ll use it to demonstrate how you can connect and further manage it via TMC.
For the purpose of this demonstration I’m using SaaS edition of TMC. However, recently VMware released a self-maneged version of TMC as well! Therefore, if you are running in an air-gapped environment – you still can get all of it’s benefits on-premises.
Then let’s do it and bring my management cluster under TMC umbrella!
1. Login to your cloud portal at console.cloud.vmware.com. If you have access to multiple organziations make sure you’ve switched to the one that have access to TMC.
2. Click Launch Service under VMware Tanzu Mission Control.

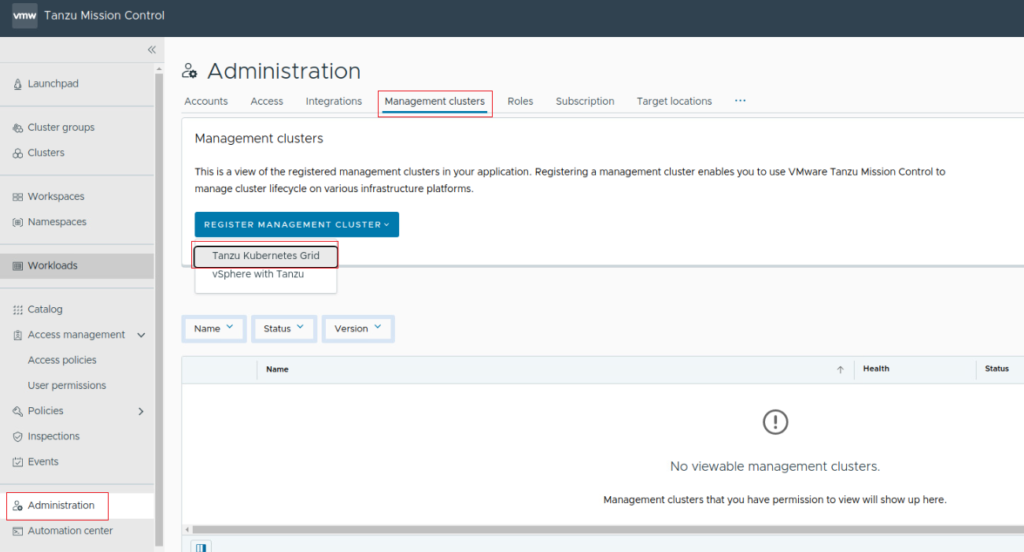
3. Navigate to Administration > Management Clusters and select Tanzu Kubernetes Grid under Register Management Cluster Menu.

4. Under the Name and assign tab specify the cluster name and as a minimum the default cluster group. Just bear in mind that the name cannot start with capital letter!

5. Define whether you want to use Local Image Registry or / and Proxy and click Next. Both of these options are optional. In my environment I’m not using any of them.

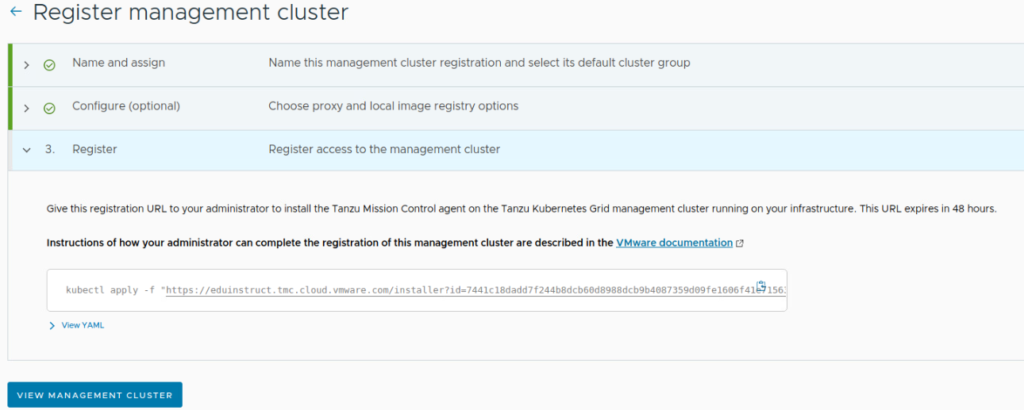
6. Once you click last Next you will get a kubectl apply -f command with an URL pointing to generated YAML file which you can expand below.


7. Copy the command, you will run on Managemnt Cluster.
8. Change conext to your Management Cluster, paste and execute previously copied kubectl command.

As you can see this YAML has just created a few objects required by TMC including vmware-system-tmc namespace.
9. Run kubectl get all -n vmware-system-tmc command to check status of all newly created objects.

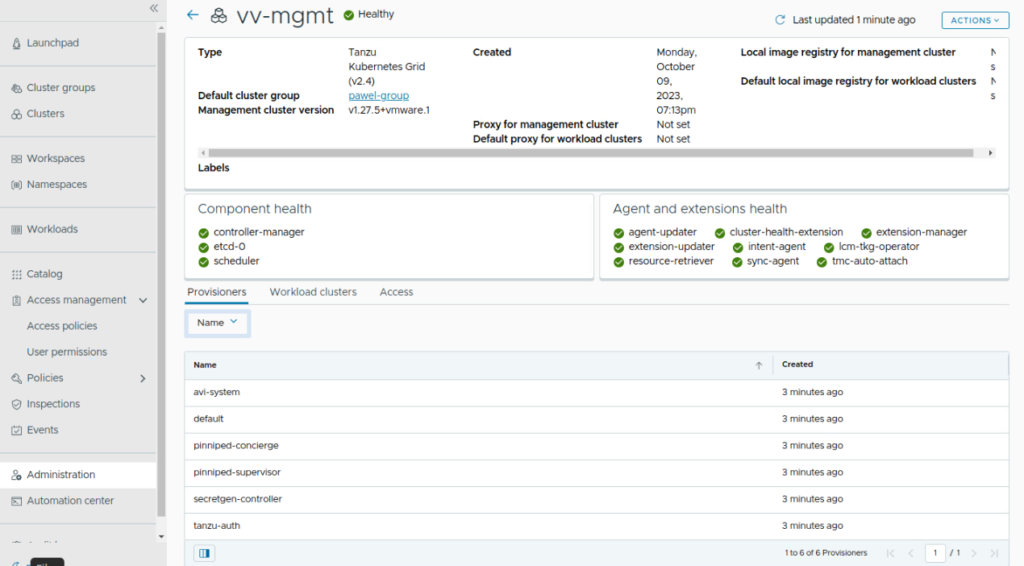
10. Get back to TMC console and click View Management Cluster to see the status. After a few moments you should get all the informaiton about your management cluster.

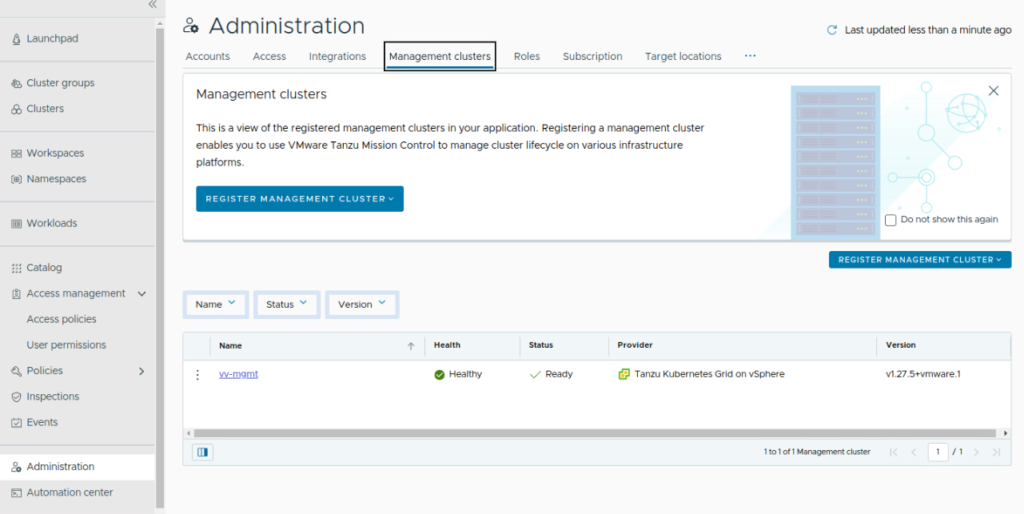
Your cluster will be listed under Management Clusters view as well.

This confirms we’ve managed to successfully add a management cluster to TMC 🙂
Now, we can leverage that to create and further manage workload clusters using TMC console. This is something I’m going to walk you through in future blog posts, so as always – stayed tuned!