TKG Supervior cluster deployment guide without NSX
TKG Supervisor cluster is deployed as part of vSphere with Tanzu which provides ability to deploy TKG workload clusters (also known as guest clusters in the past) as well as vSphere Pods within a vSphere Cluster. All together with ordinary VMs in the same cluster. The main difference between the TKG with Management cluster (also known as standalone TKG) is that with vSphere with Tanzu we define additional object that can provide resource isolation for workload clusters (and/or vSphere Pods). That object is called a vSphere Namespace, defined within supervisor cluster with permissions and resources, providing the control and governance over resources to a vSphere Admin.
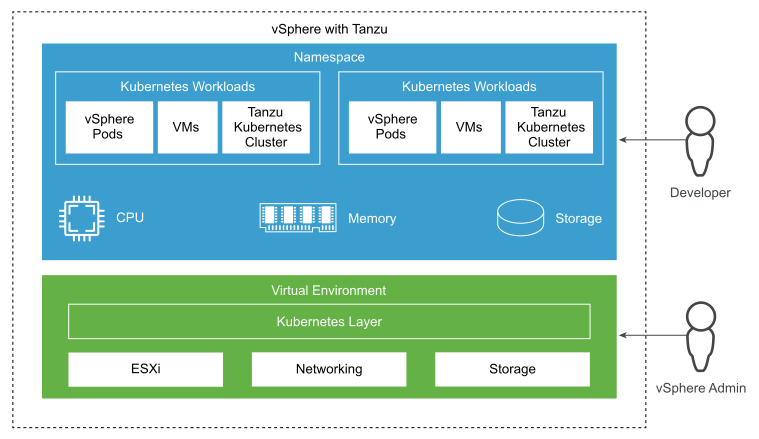
From deployment perspective the overall process is very similar to Management Cluster deployment that you can check here. But it’s not the same, that’s why we are going to go through these steps of deploying it. In my lab I’m going to use VDS without NSX which means vSphere Pods won’t be avaiable.
Preqrequisites:
- A (virtual) machine with Tanzu CLI and ubectl installed having access to your vCenter. If you want to see steps required to install Tanzu CLI and Kubectl you can refer to bootstrap machine preparation I’ve described here.
- Content Library created in vCenter
- TKG template image (OVF) imported to Content Library
- Storage Policy (at least one is mandatory – doesn’t matter whether it’s vSAN or simply tag based storage policy)
- One or three vSphere clusters associated with vSphere zones*
- Supported Load Balancer – in my case, as I decided to not use NSX-T available option is either NSX Advanced Load Balancer or HAProxy. I’ll proceed with NSX ALB.
- License
*Starting from TKG 2.0 (and vSphere 8) it’s supported to use multi-zone deployment based on vSphere Zones that you can use to provide cluster-level high availability for Supervisor and workload clusters. It requires three vSphere clusters with at least 3 hosts in each zone which is quite a significant overhead for small environments (and my lab 🙂 ) that’s why I’ll stick to a single-zone deployment.
Alright, as we’ve got prerequsities covered, let’s get our hands dirty!
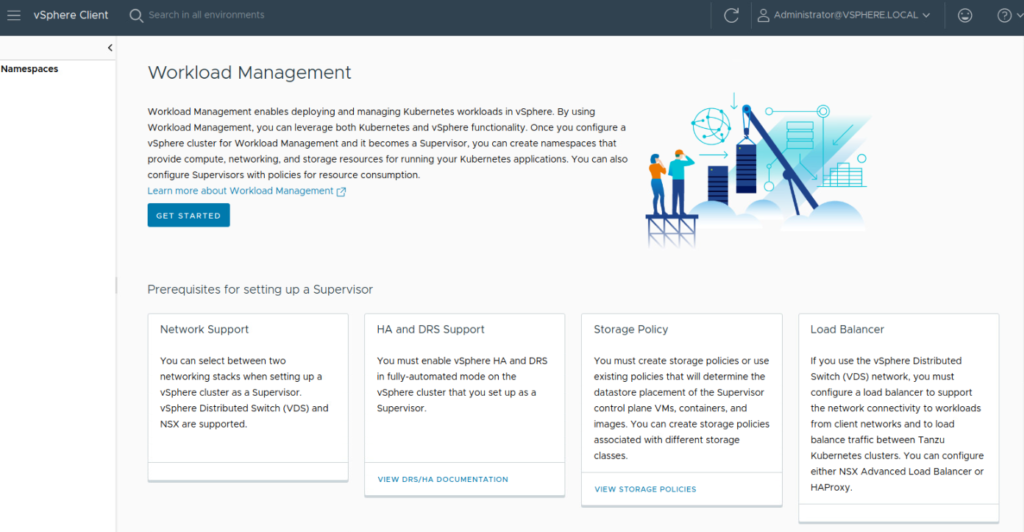
1.Navigate to vSphere Client and from the hamburger menu select Workload Management, and click GET STARTED.
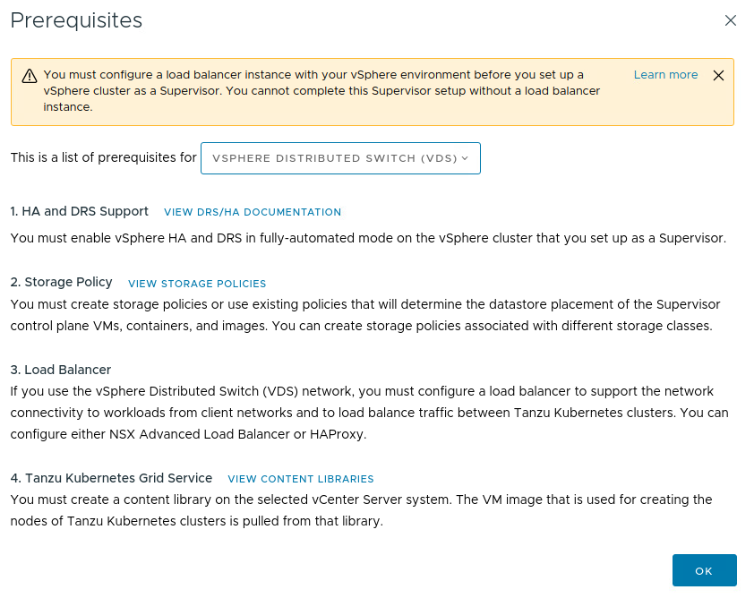
2. Review all prerequisities here and make sure you comply before hitting OK.
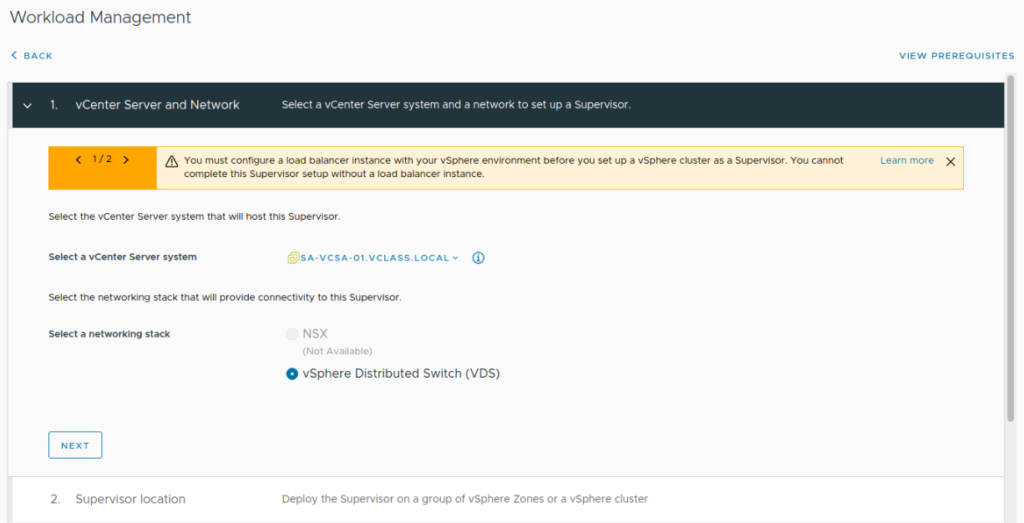
3. Here you can select whether you want to use NSX (that will support vSphere Pods as well as TKG workload clusters) as a networking stack or VDS. In my case I’m selecting VDS stack, NSX is not available in my environment.
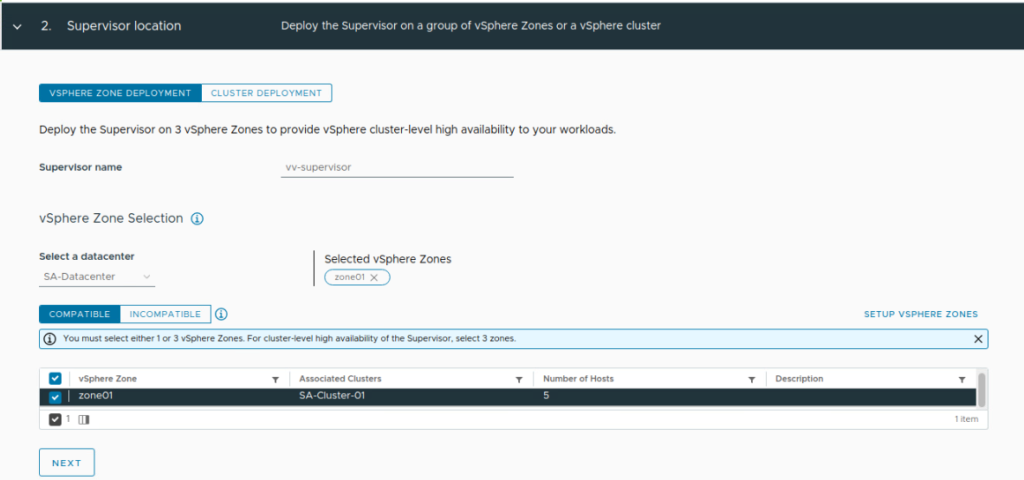
4. Select vSphere Zone Deployment where you can specify vSphere Zones mapped to clusters (one or three) or Cluster Deployment if you want to deploy it using the “old” way for example with 3 control plane node VMs.
Note: If you select vSphere Zone Deployment with a single zone (like in my environment) you will get a single control plane VM deployed only.
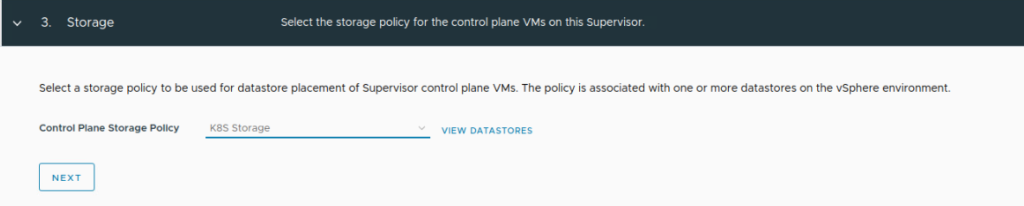
5. Select the storage policy that will be used for Supervisor Control Plane VMs.
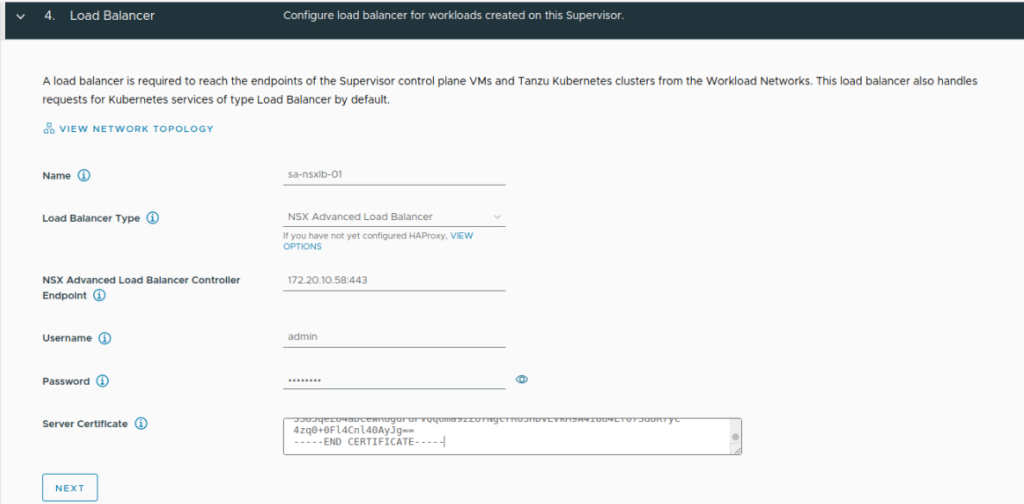
6. Select Load Balancer type – your option is either NSX ALB or HAProxy – and YES it must be prepared in advance!
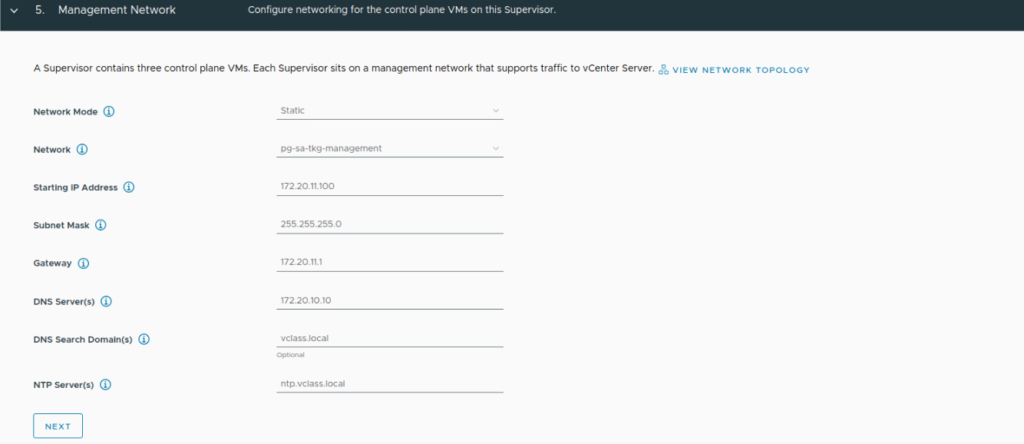
7. Under Management Network card you need to specify IP assignment mode – either DHCP or Static.
Note: With static assignment wizard asks about Starting IP Address – if you are deploying a full, 3-node control plane then 5 consecutive IP addresses will be taken. Three for each control plane VM, one for floating VIP and one for rolling upgrade scenarios.
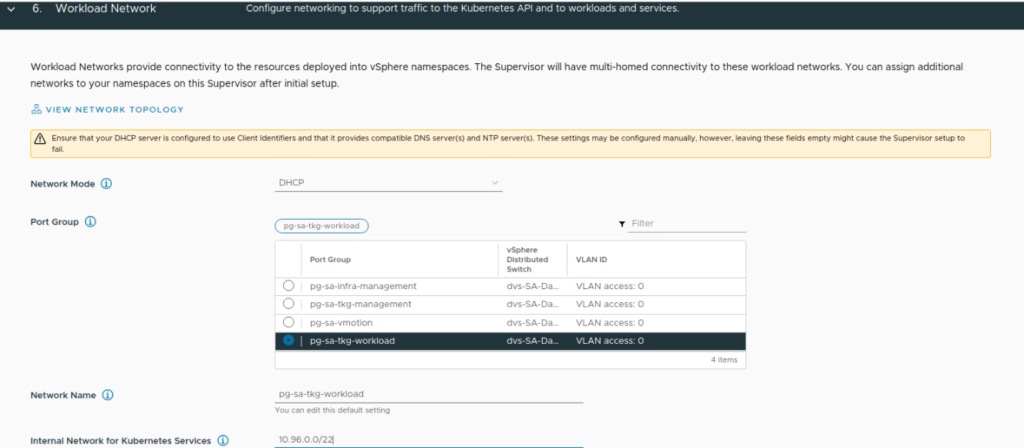
8. Once we’ve got management network defined, now it’s turn for workload network – similar story. Define Network Mode assignment either DHCP or static, port group, network name as well as the internal network for Kubernetes Services.
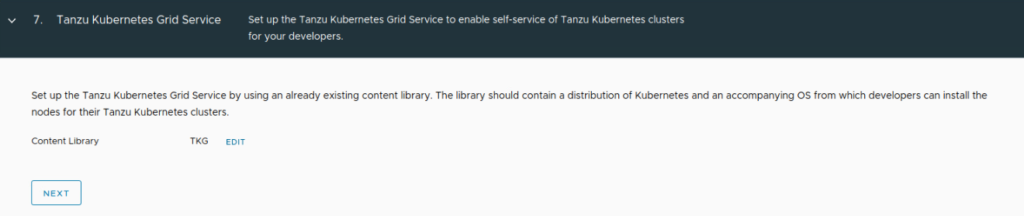
9. Specify the Content Library where you’ve uploaded TKG image.
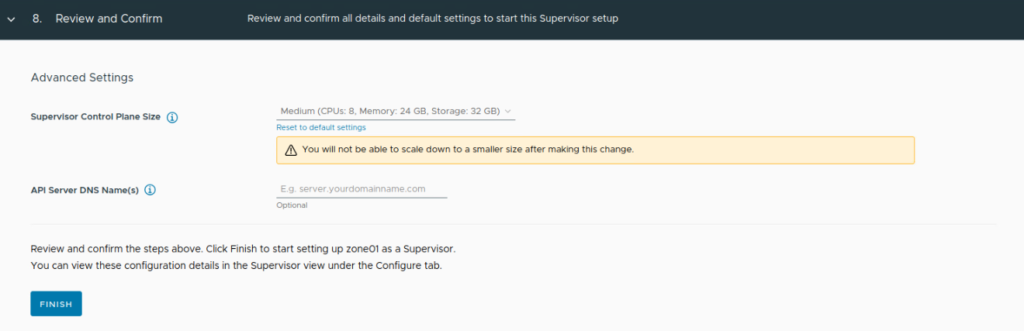
10. Define the Control Plane VM size and click FINISH. Bear in mind that it won’t be possible to scale down later as the warning specifies.
Deployment will take a few minutes depending whether you are deploying one or three-node cluster and obviously how fast your environment is. During the deployment you will see some ongoing tasks in vCenter and Supervisor cluster config status being frequently updated. (I’d recommend to use the refresh button on your own as well as sometimes the automatic refresh doesn’t really work as it should.)

One of the last steps of the deployment is to install a TKG plugin in your vCenter. Once it’s done you might notice a note on the top of your screan saying it was dpeloyed successfully, something similar to the one below.

And to confirm that your supervisor cluster should finally turn green with Running status.

Immediately, you will see there is a warning on that cluster. It’s due to licensing evaluation mode, assign the license in Licensing section of your vCenter and it will be gone.
To further verify the status you can click on the supervisor cluster name to see details.
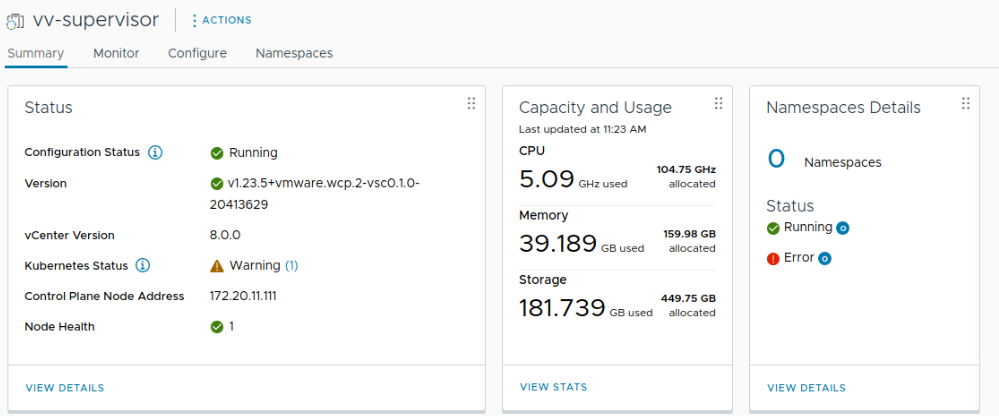
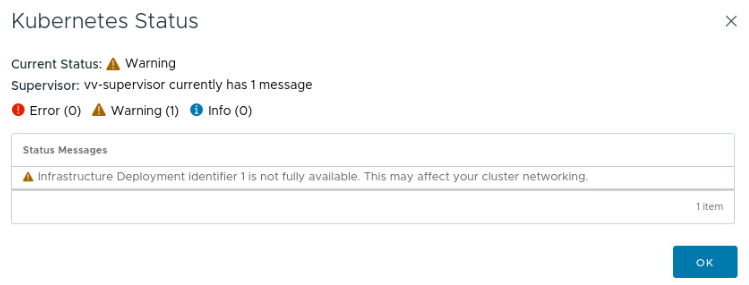
Note: Additional warning you might be getting is related to a single control plane deployment (if you didn’t select a cluster or three-zone deployment). By clicking the (1) sign next to Kubernetes status you will get details and information what the warning is about.
And here we are! Supervisor cluster is ready. Now we can start consumption but before we can create any workload clusters a vSphere Namespace need to be created. We need to also connect to our Supervisor cluster using Tanzu CLI. All these steps can be found in the second part available here.