vSphere 6.5 Installation – Part 4 – vCenter Server Appliance Upgrade
In the previous parts I described the process of instalation new components of vSphere 6.5. In this article I’ll show you how the upgrade process looks like. It’s pretty straightforwar providing your DNS is working correctly 😉
During the upgrade process new appliance is deployed with temporary IP address to exchange the original appliance in the final step. This approach gives you the easy way to rollback, because you can turn off the new appliance and power on the original one at any stage.
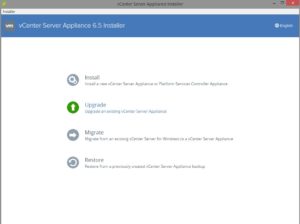
1. The first step is to download the vCSA ISO image and mount it for instance to your desktop. Inside the ISO image go to D:\vcsa-ui-installer\win32 and run the installer.exe. (This is the same ISO image used for PSC deployment). This time we choose the Upgrade option.
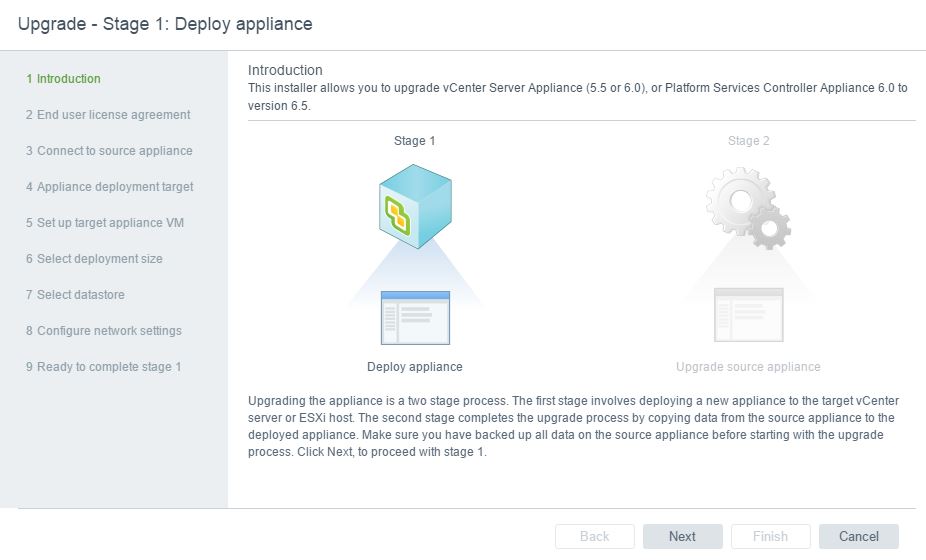
2. As other types of installation In vSphere 6.5 the process of upgrade is divided into two phases, or more correctly stages. The first stage contains the deployment of the new appliance where it is deployed in our infrastructure. The second stage will let you configure the PSC and creating SSO domain, etc. It’s nothing to do on this step, simply click Next.
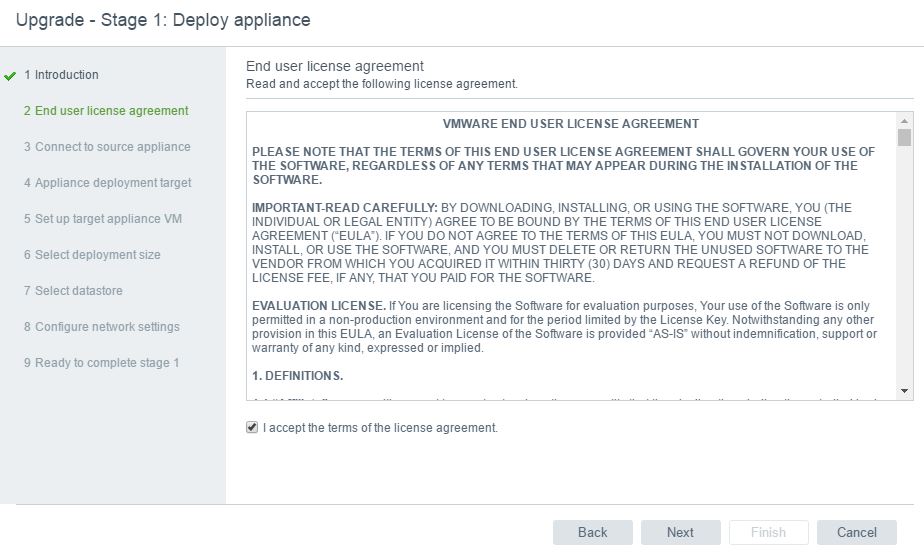
 3. Accept the End User License Agreement and click Next.
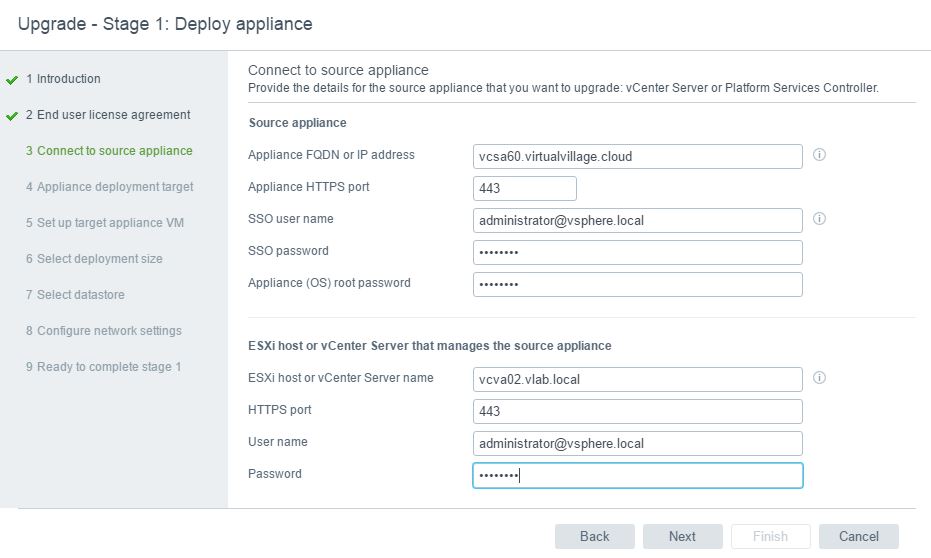
4. Now you have to specify the information about source appliance (the original one which you are going to upgrade) and also the FQDN and credentials of the system where this appliance resides on. It could be either ESXi host or another vCenter server (e.g. Management’s cluster vCenter). Make sure you typed it correctly and click Next.
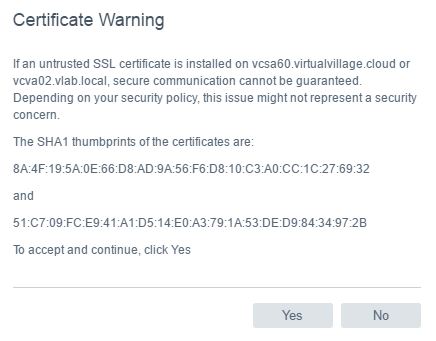
5. Verify and confirm the Certificate warning.
6. Specify the destination host/vCenter where the new appliance will be deployed. Click Next.

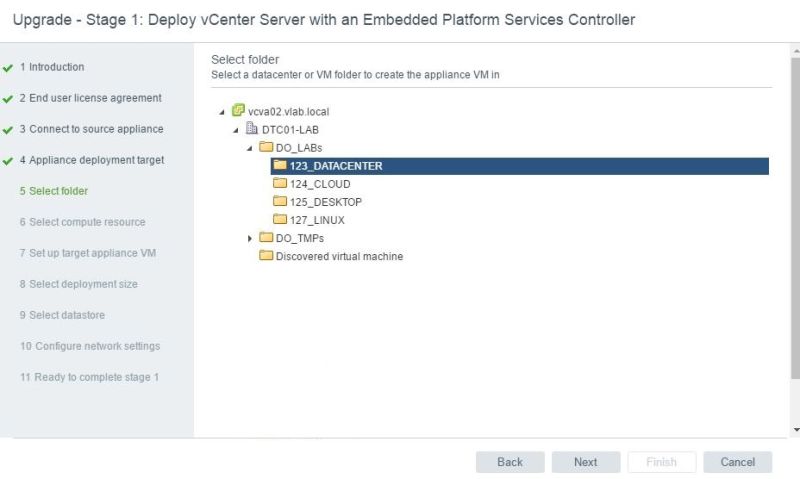
7. In case you chose the vCenter to connect, you can indicate a specific folder for the appliance. Click Next.
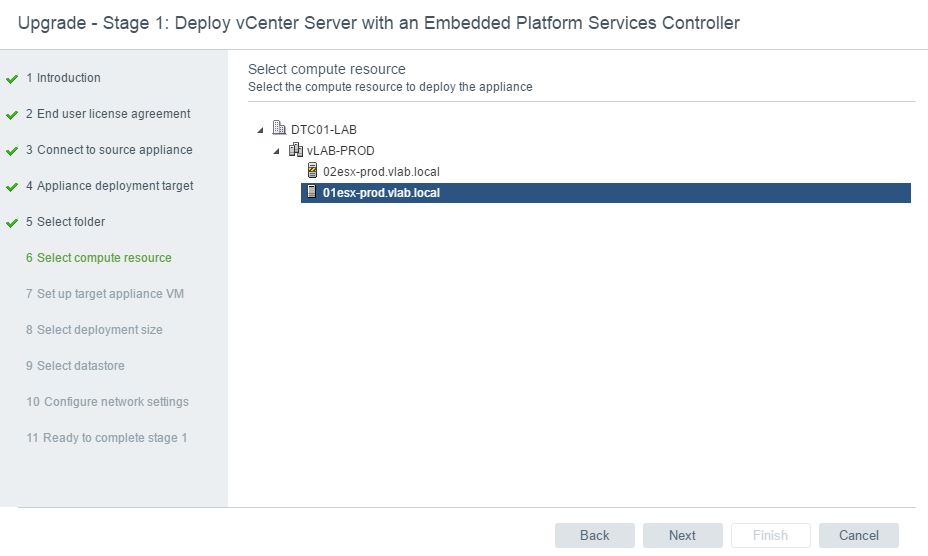
8. Additionally you can choose the specific host.
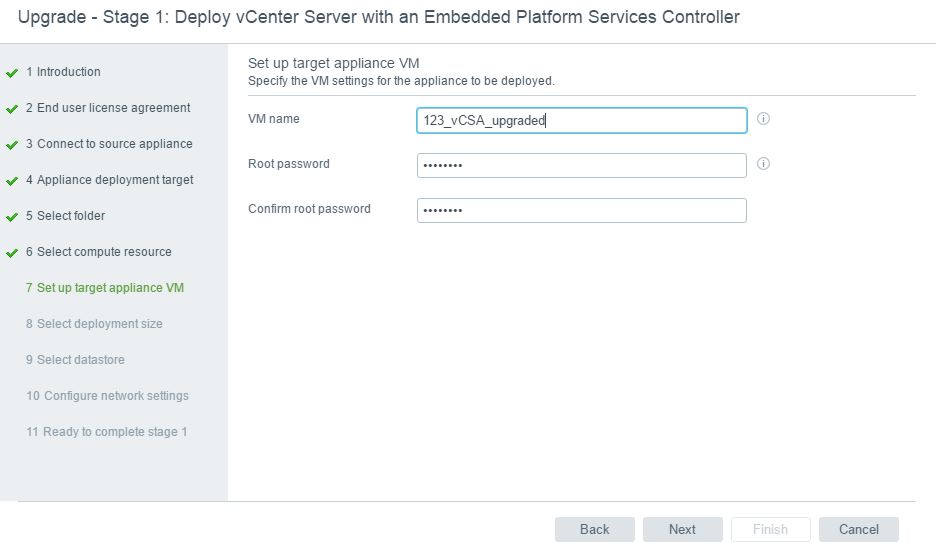
9. Provide the virtual machine name for new appliance and root password.
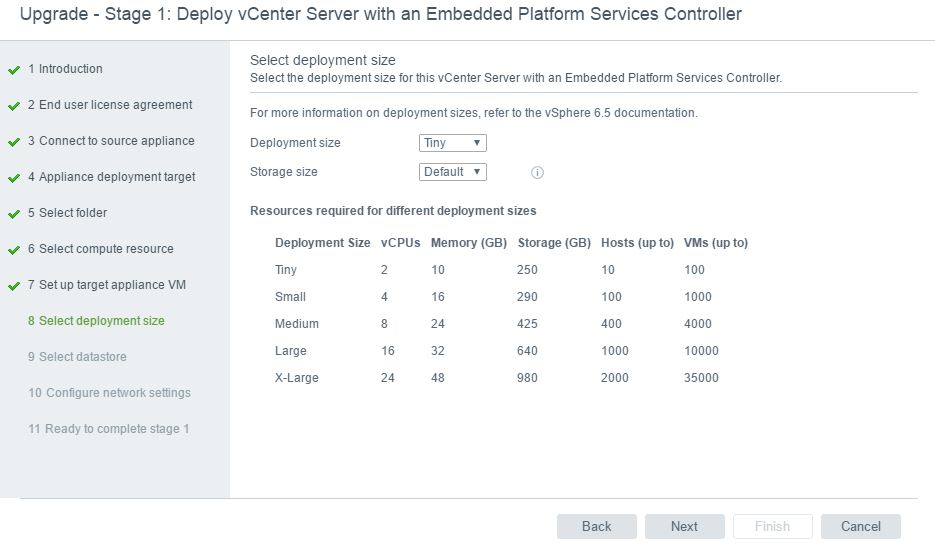
10. Choose the right size of your deployment. VMware was so nice and inclueded information on the screen to let you choose the right size for your environment. In my case it’s “just” the lab so Thiny version will be more than enough. This is the time when you can easily expand the appliance limit if you need so. Click Next to go further.
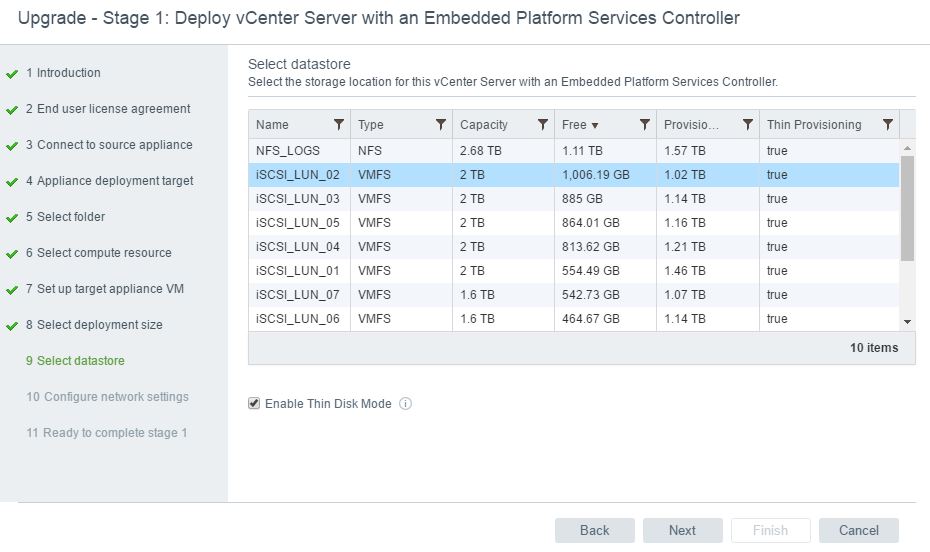
11. Choose the datastore you want to use. There is also an option to configure the appliance this in thin provisioning mode. If you prefer so, simply mark the checkbox “Enable Thin Disk Mode” and click Next.
12. This steps requires the network configuration. You are supposed to provide port group from the available list of port groups configured on ESXi host/vCenter you choosed before. Furthermore you need to provide a temporary IP address which will be used untill the configuration from oryginal appliance is transfered.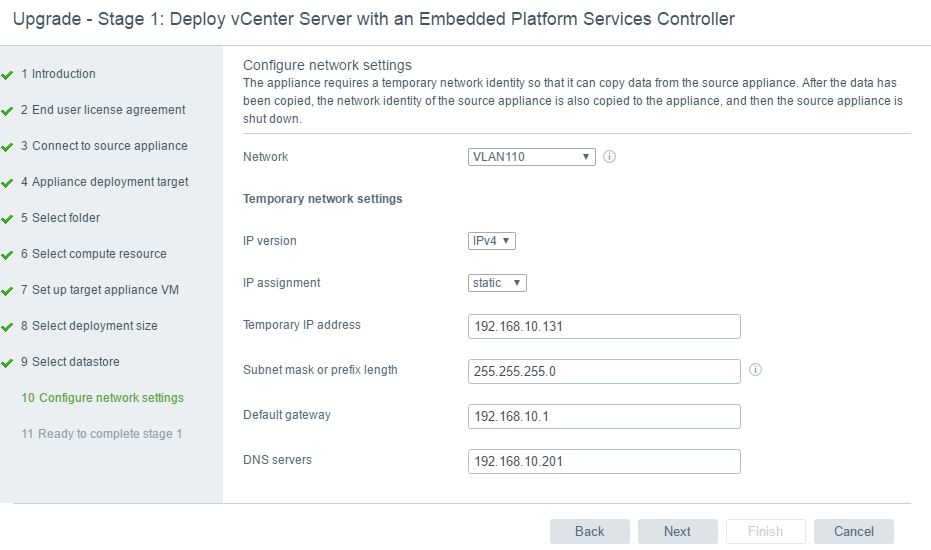
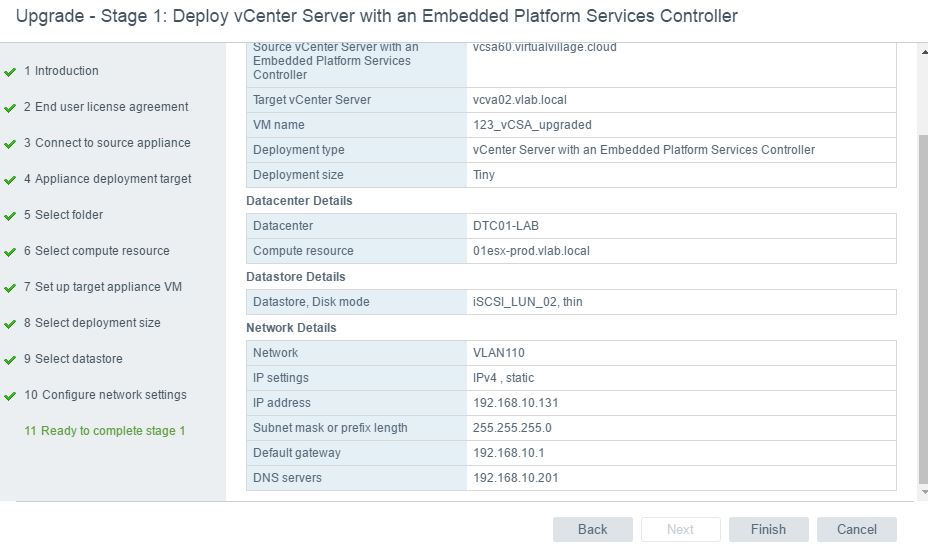
13. Last step in stage one – confirmation. If all settings are correct click Finish to start the deployment process.
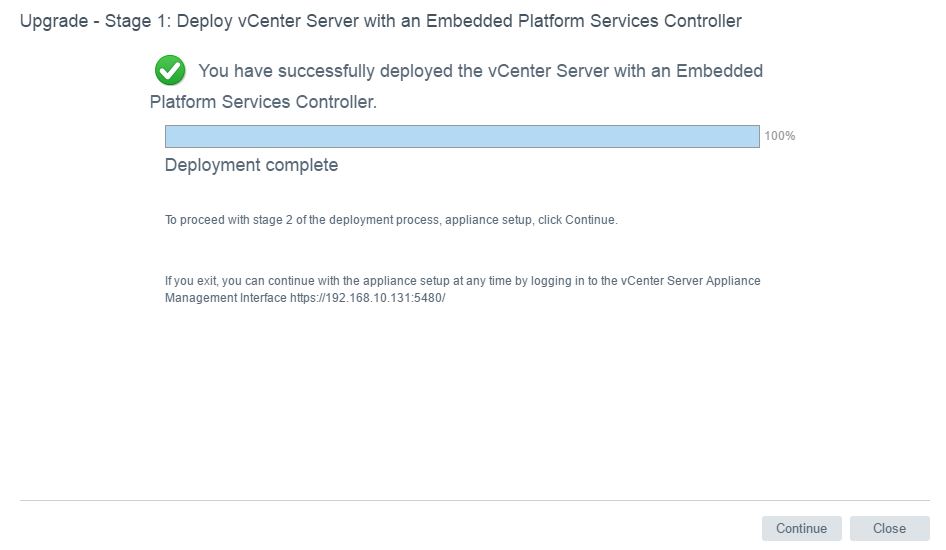
14. When the deployment stage is done you go pass to stage 2 – the real migration of your vCenter Server Appliance data and configuration. To do that, click Continue.
15. Again you will see the welcome screean which informs you that this is the beginning of stage 2. Click Next to start.
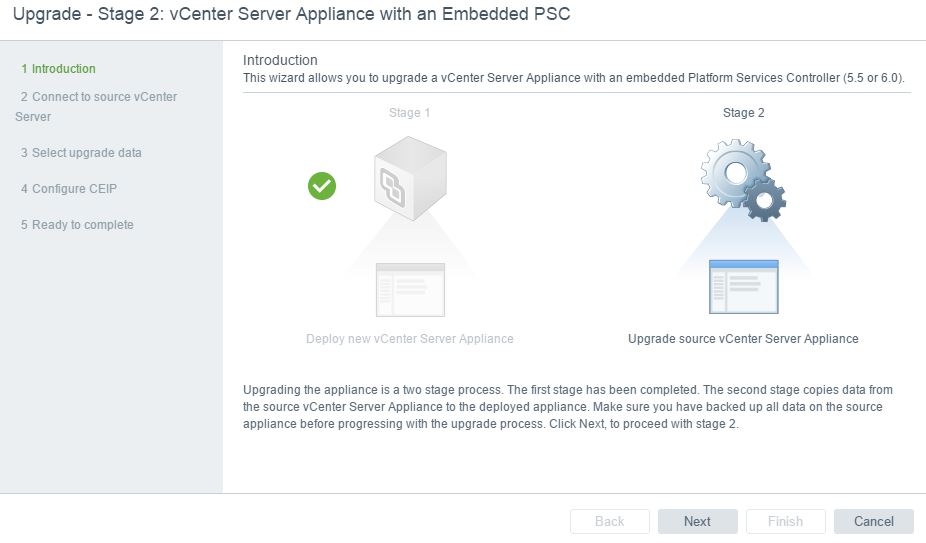
16. Here you will see the summary of information you provided in previous stage. 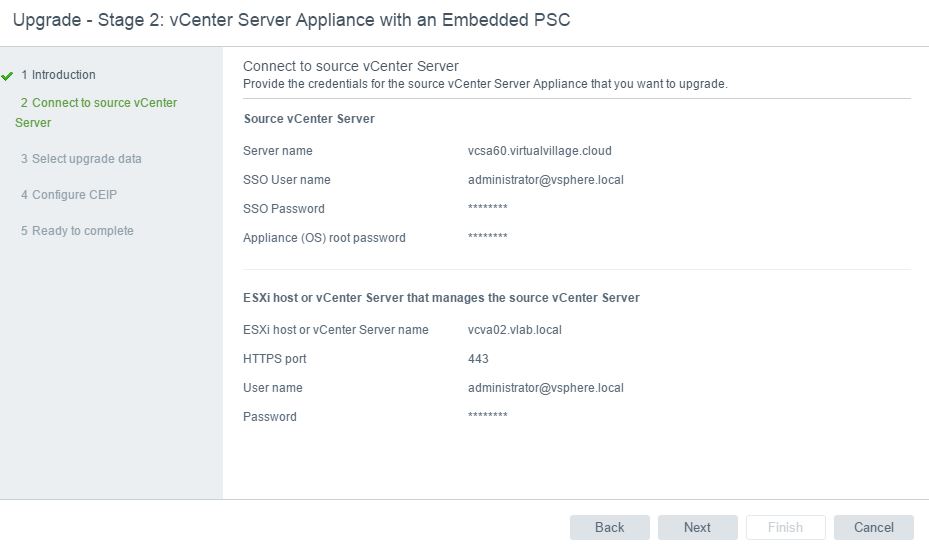
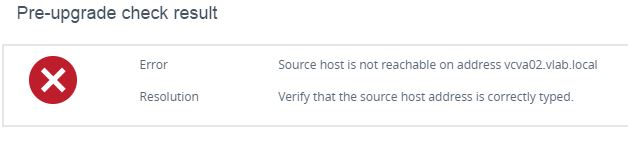
Caution!! From this panel you can not change these settings at this step. If you made a mistake before and you an error that source host is not reachable on specific address you can close this installer and access it at https://IP_of_temporary-VCSA:5480 and there you can change these settings and continue the installation.
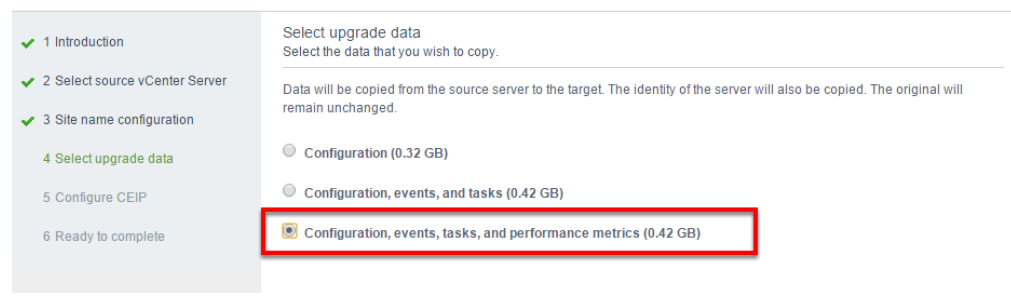
17. Here you can choose which ought to be migrated. In my case I want to perform complete upgrade, preserving all data, tah’s why I’m choosing the last option – COnfiguration, events, tasks and performance metrics. You have to notice that this option will need to migrate the most amount of data.
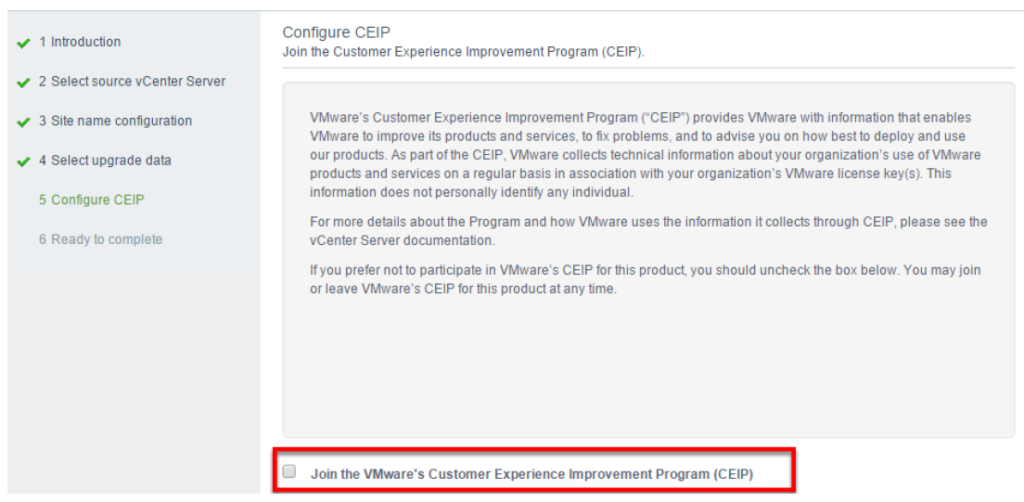
18. Untick the participation in VMware CEIP program and click Next.
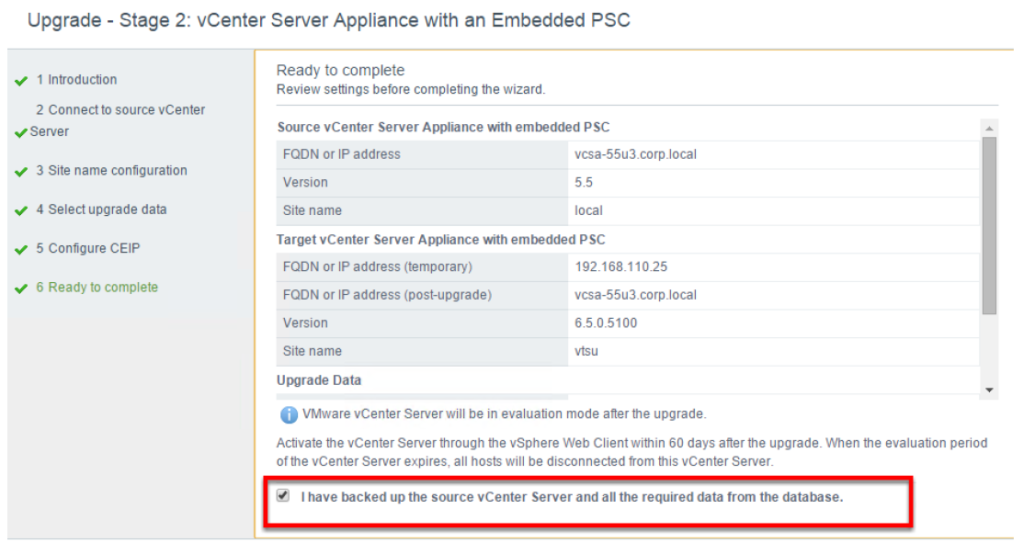
19. Review the summary and click Finish.
After few minutes (depending on the amount of data that have to be replicated) your new vCenter Appliance will be up and ready.
Please, see also the other parts of the series: