vSphere 6.5 Installation – Part 3 – vCenter Server on Windows
This is the third part of the series in which I’m describing the process of installation vSphere 6.5 components. In this part I’ll go throught the process of installation vCenter Server on MS Windows Server 2012 R2.
The others parts are:
- vSphere 6.5 Installation – Part 1 – External PSC
- vSphere 6.5 Installation – Part 2 – vCenter Server Appliance
Now let’s check how the Windows installation looks like in the latest vSphere version.
Prerequisities:
- ISO for vCenter Server installation. Keep in mind that this is different ISO than used to PSC or vCSA deployment.
- Account which can log in as a service (you can add it from Local Security Policy -> Local Policies -> User Rights Assignment -> Log on as a service)
- (Optional) External Database with correctly configured ODBC.
For this demonstration I’m using embedded Postgress SQL instance which have the same limit as an external database and In my opinion in most cases it’s the best option.
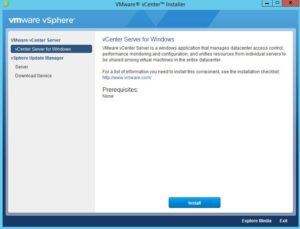
1. The first step you have to do after you download the ISO image is to start the autorun. Then you choose the vCenter Serwer for Windows option and click Install button. You will also notice that there is no option to install vSphere Client for Windows from the installer page. However in vSphere 6.0 you were able to find the installer on the ISO in vSphere-Client folder. Unfortunatelly in vSphere 6.5 there is no more C# client for windows…For most of you (including me) it’s really bad news, althought there is the light at the end of the tunnel – new HTML5 client 🙂 It’s completely new and different user interface and I’ll devote the whole part of the series to show closer how it looks like.
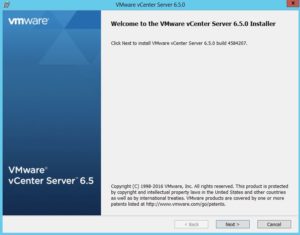
2. On the welcome screan simply click Next.
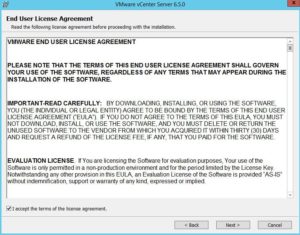
3. Accept the End User License Agreement and click Next.
4. Choose the deployment type page allows you to choose which component should be deployed. In my case the external PSC was deployed in previous step and now I’m choosing vCenter Server. It’s important to notice that external PSC must be deployed before you start the deployment of vCenter Server Appliance.

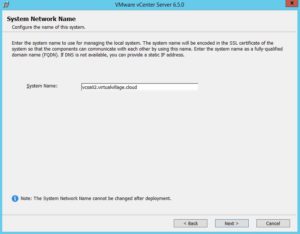
5. Define the System Name. Notice that the FQDN you specify is already present and configured in your DNS. Click Next.
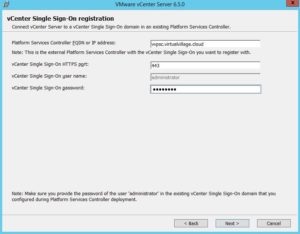
6. This is the step when you have to connect with your PSC and SSO domain. Provide the PSC FQDN name, SSO domain name, password for Administrator, and click Next.
7. Choose the account you would like to use for the installation. You could use the current account you are logged in or specify an other service account. Click Next.

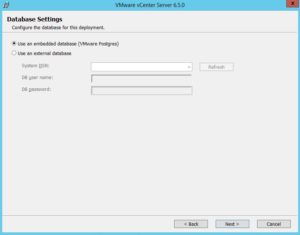
8. This is the step where you can choose the database type. As I mentioned before in most cases I recommend to use embedded PostgreSQL. However you could also specify the external one. Click Next.
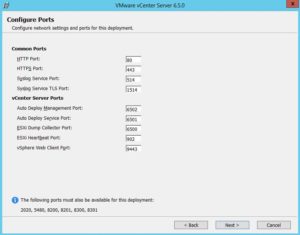
9. Confirm or specify some unusual port addresses you are going to use for specific services used by vCenter. Click Next.
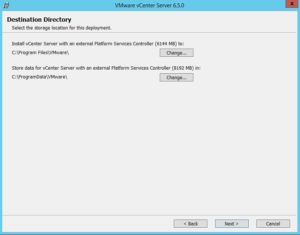
10. Specify the installation directory or leave the default values and click Next.
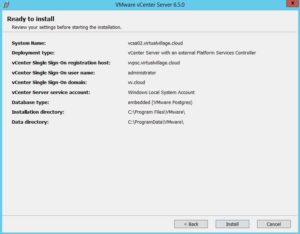
11. Review the summary page and click Install to begin the installation process.
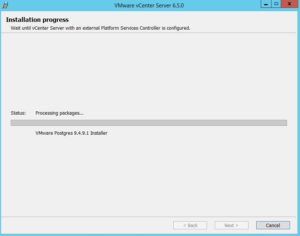
12.Monitor the installation progress.
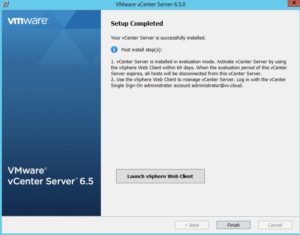
13. After the installation is completed you can Launche vSphere Web Client and begin the real configuration of your management server.
If you want to try new HTML5 client you can type the https://vC_FQDN_IP in your browser and choose HTML5 option or go straight to https://vC_FQDN/ui
As you can notice on the vC welcome screan the HTML5 client is not fully functional yet. In the next part of the series I’ll go throught the new client to show you how it looks and how to navigate so please stay tuned 🙂