vSphere 6.5 Installation – Part 2 – vCenter Server Appliance
In the previous Part I of the series, I described the installation process of external PSC in vSphere 6.5. In this part I’ll go through the process of vCenter Server appliance deployment.
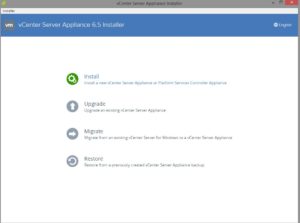
- The first step is to download the vCSA ISO image and mount it for instance to your desktop. Inside the ISO image go to D:\vcsa-ui-installer\win32 and run the installer.exe. (This is the same ISO image used for PSC deployment). Then we choose the Install option, as you can see there are also available such option as Upgrade, Migrate and Rocever. All of them will be described further in next part of the series.
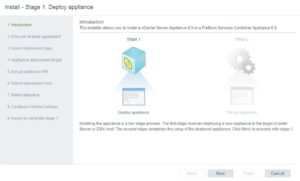
- In vSphere 6.5 the process of deployment is divided into two phases, or more correctly stages. The first stage contains the deployment of the appliance where it is deployed in our infrastructure. The second stage will let you configure the PSC and creating SSO domain, etc. It’s nothing to do on this step, simply click Next.
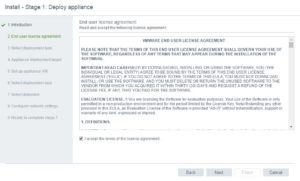
- Accept the End User License Agreement and click Next.
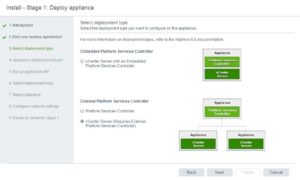
4. Choose the deployment type page allows you to choose which component should be deployed. In my case the external PSC was deployed in previous step and now I’m choosing vCenter Server. It’s important to notice that external PSC must be deployed before you start the deployment of vCenter Server Appliance.
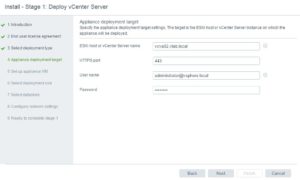
5. In this step you have to provide the information about the host or vCenter where the appliance will be deployed. I’d like to emphasiss the option with vCenter which is new and in my opinion very helpful. It’s also the recommended option, of course if you already have a vCenter in place. That’s because if you connect directly to an ESXi host and it is in a DRS cluster, DRS initiated vMotions may occur during deployment process. To prevent this, you can either connect to vCenter managing the ESXi host or ensure the cluster where this ESXi host resides is not set to Fully Automated DRS for the duration of the deployment. You also need to provide the credentials to vCenter or ESXi host for an user that have the privileges do deploy and configure virtual appliances.
6. Verify and confirm the Certificate warning.

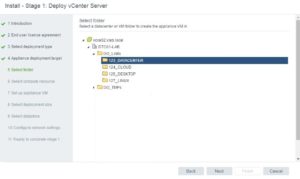
7. In case you have choosen the vCenter to connect tom, you can indicate a specific folder for the appliance. Click Next.
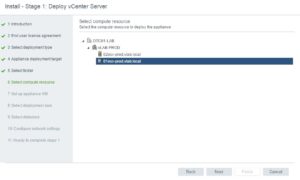
8. Choose the correct ESXi host to deploy it and click Next.
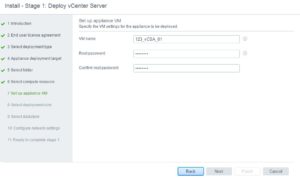
9. Specify the Virtual Machine name, root password and click Next.
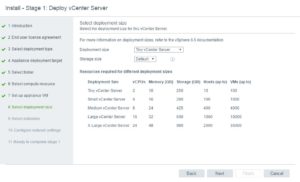
10. Choose the right size of your deployment. VMware was so nice and inclueded information on the screen to let you choose the right size for your environment. In my case it’s “just” the lab so Thiny version will be more than enough. Click Next to go further.
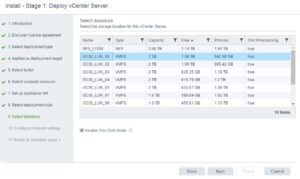
11. Choose the datastore you want to use. There is also an option to configure the appliance this in thin provisioning mode. If you prefer so, simply mark the checkbox “Enable Thin Disk Mode” and click Next.
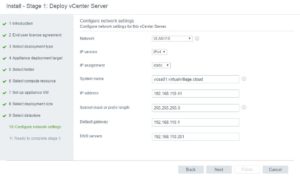
 12. This steps requires the network configuration. You are supposed to provide port group from the available list of port groups configured on ESXi host/vCenter you choosed before. There is also a place for system name which is optional (in case you don’t provide it, IP address will be used instead)
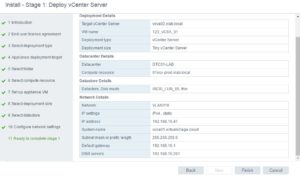
 13. Last step in stage one – confirmation. If all settings are correct click Finish to start the deployment process.
14. After all you can observe the progress via installator and host/vCenter.
![]()
![]()
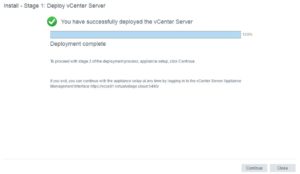
15. When the deployment stage is done you go pass to stage 2 – basic configuration of our vCenter Server Appliance. To do that, click Continue.
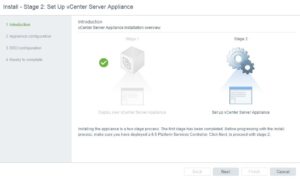
16. Again you will see the welcome screean which informs you that this is the beginning of stage 2. Click Next to start.
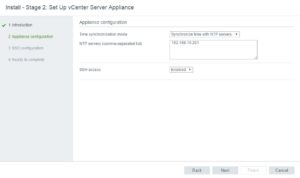
17. Provide the IP address of NTP Server, mark the enable SSH checkbox and click Next.
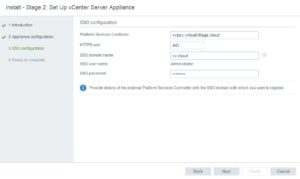
18. This is the step when you have to connect with your PSC. Provide the PSC FQDN name, SSO domain name, password for Administrator, and click Next.
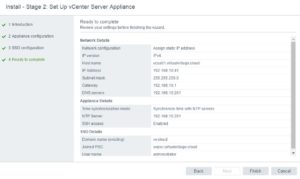
19. Review all the configured options and values and click Finish.
20. You will need to confirm the warning that you are completely sure about your choice. The process could not be interrupted after that.

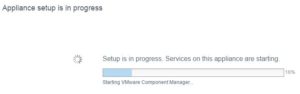
21. Again as in the stage 1 you can monitor the progress untill it’s finished.
22. After the deployment is done, you can access the using the IP or FQDN name with port 443.
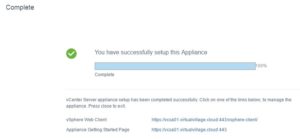
It’s done you vCenter Server Appliance is up and ready to start work with.
In the next part I’ll describe the straightforward process of Windows vCenter Server installation.
Please, check the other parts of the series: