TKG Supervisor cluster – initial configuration
In the previous blog post I’ve covered the deployment of a Supervisor Cluster as well as initial login and checking the deployment. Now it’s time to get it configured, at least initially.
Let’s take a look at the required steps to get it done!
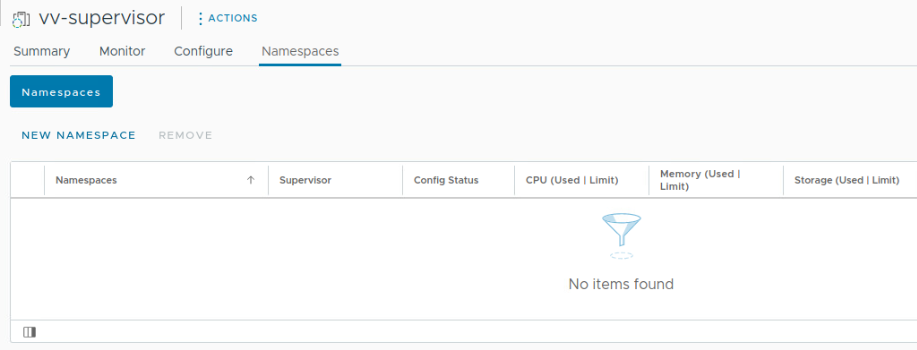
1.Select Namespaces tab under your bran-new Supervisor cluster and click NEW NAMESPACE.
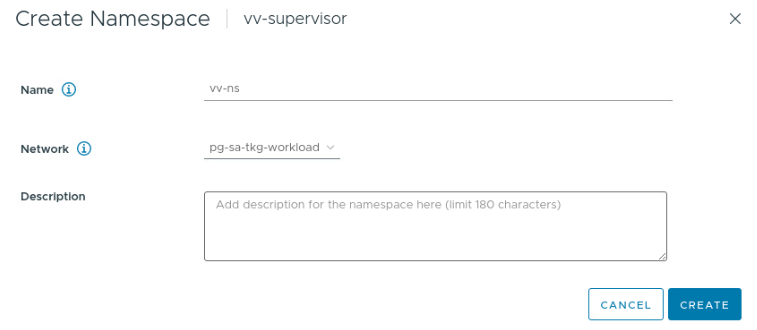
2. Provide a name (it must be DNS-compliant), select network (only networks defined during depoyment as workload networks are available here), add description and click CREATE.
3. Once the namespace is created we can define permissions, resources and VM classes.
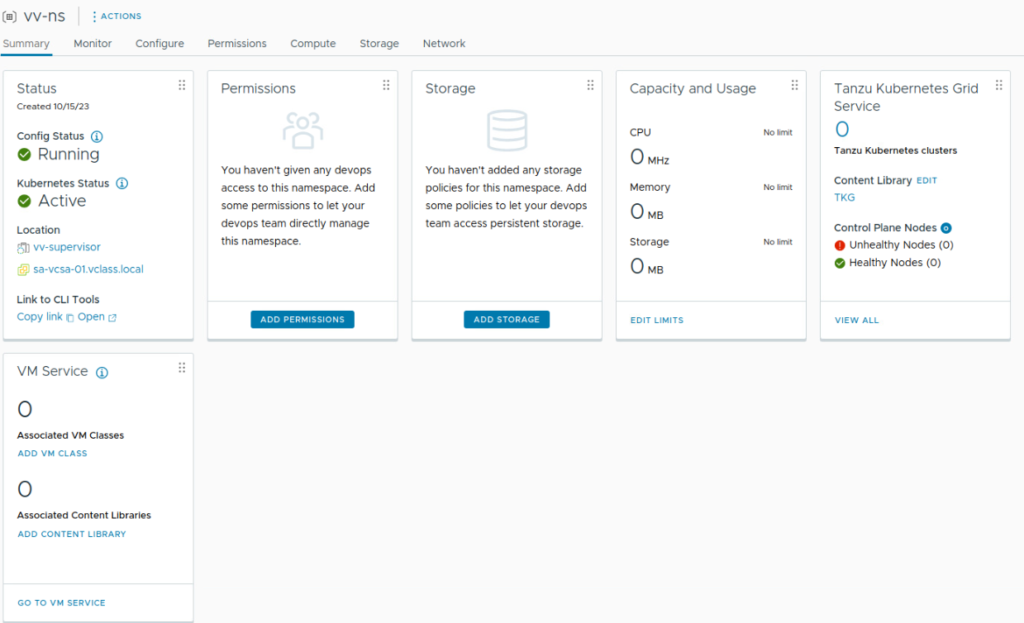
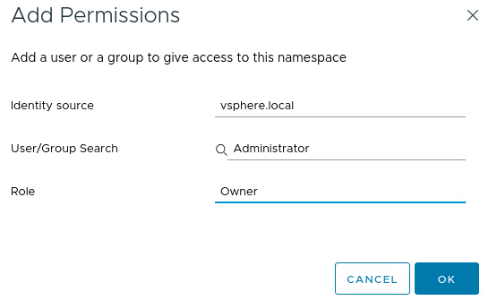
4. Click ADD PERMISSIONS to add permissions using accounts or groups provided by any Identity Source available in your vCenter SSO. Permissions can be further managed under Permissions tab on the vSphere Namespace configuration page.
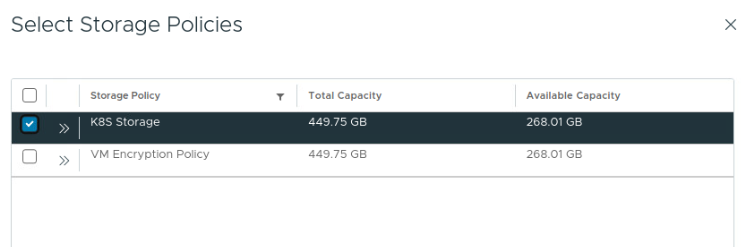
5. Assign a storage policy that can be used for workload cluster VM deployment – one or more.
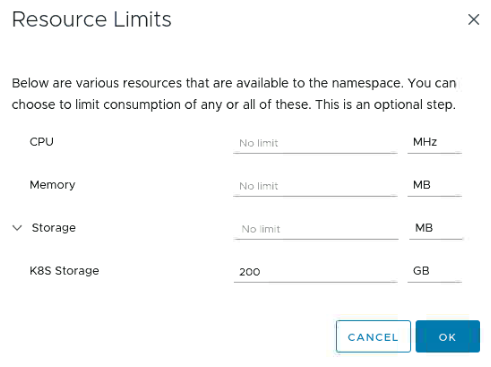
6. (Optional) Define resource limits.
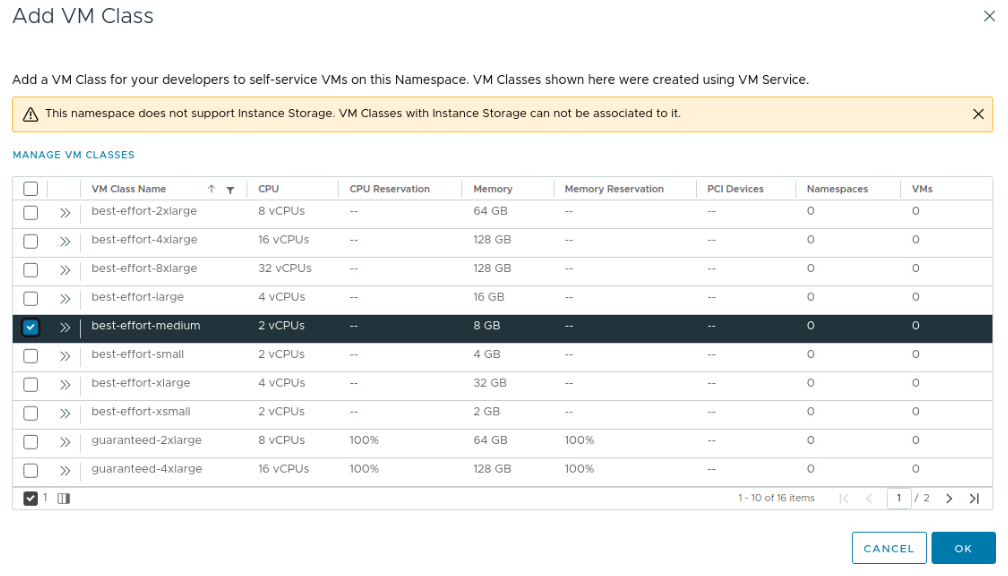
7. Specify at least one VM class that will define resources for your future workload clusters.
That concludes the minimal configuration that should be done as part of the Supervisor Cluster. But obviously we are not doing it just for fun. We need it to spin up workload clusters for our developers and applications. However, to spin-up a workload cluster which will be done via Tanzu CLI (alternatively TMC) we need to connect to it first.
Connecting to Supervisor cluster using Tanzu CLI
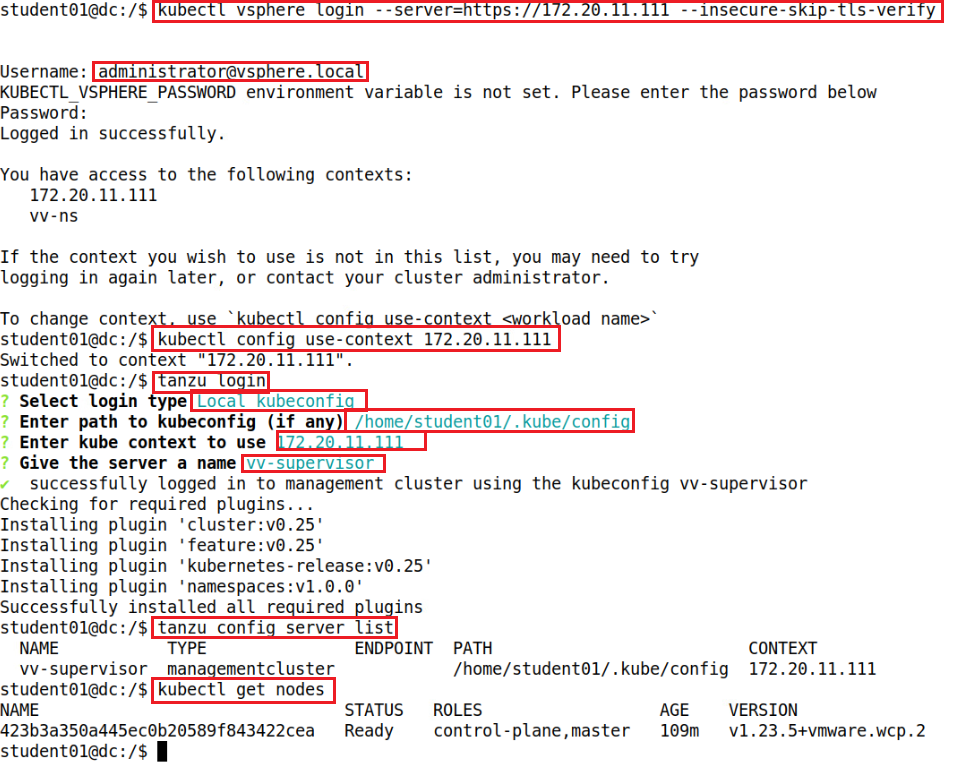
1.Create a local kubeconfig file by logging as an administrator@vsphere.local to the Supervisor with the kubectl vSphere CLI plug-in command: kubectl vsphere login --server=https://<SUPERVISOR_IP> --insecure-skip-tls-verify
2. Type the password and once logged in a welcome message should appear, followed by a list of available contexts.
3. Set the context to Supervisor Cluster: kubectl config use-context <SUPERVISOR_IP>
4. Add your supervisor cluster to the Tanzu CLI
- Run the
tanzu logincommand. - Use the down arrow to select Local kubeconfig and then press Enter.
- When prompted for a path, indicate the path to kubeconfig file.
- Enter <SUPERVISOR_IP> when prompted for a kube context to use.
- Enter a name you want to assign with your supervisor.
NOTE: As part of this process you should see some messages about a successful login and the successful installation of all required plug-ins.
5. Verify that the Supervisor was successfully added as a management cluster: tanzu config server list
Your Supervisor should appear under NAME, and managementcluster appear under TYPE. Now you are in and you can interact with Supervisor cluster using kubectl.
To read about other TKG related activities and guides – check my other posts in Tanzu category 🙂